Stellar Shot of the Month!
| |
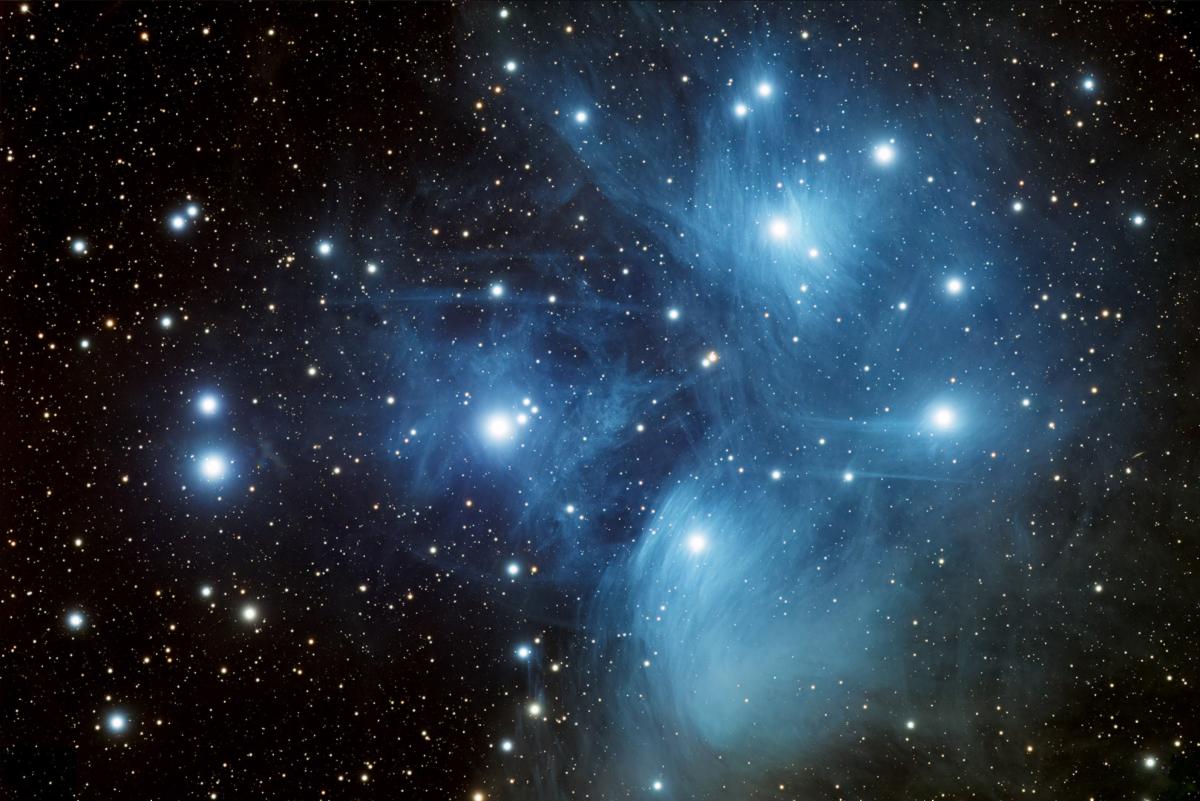
Barry Flansburg took this excellent image of M45, the Pleiades in Taurus with his SVX180T. This asterism/open star cluster is about 444 light-years away from Earth and 3 light-years in diameter. It is the nearest Messier object and among the nearest Star Clusters to Earth. | |
|
|
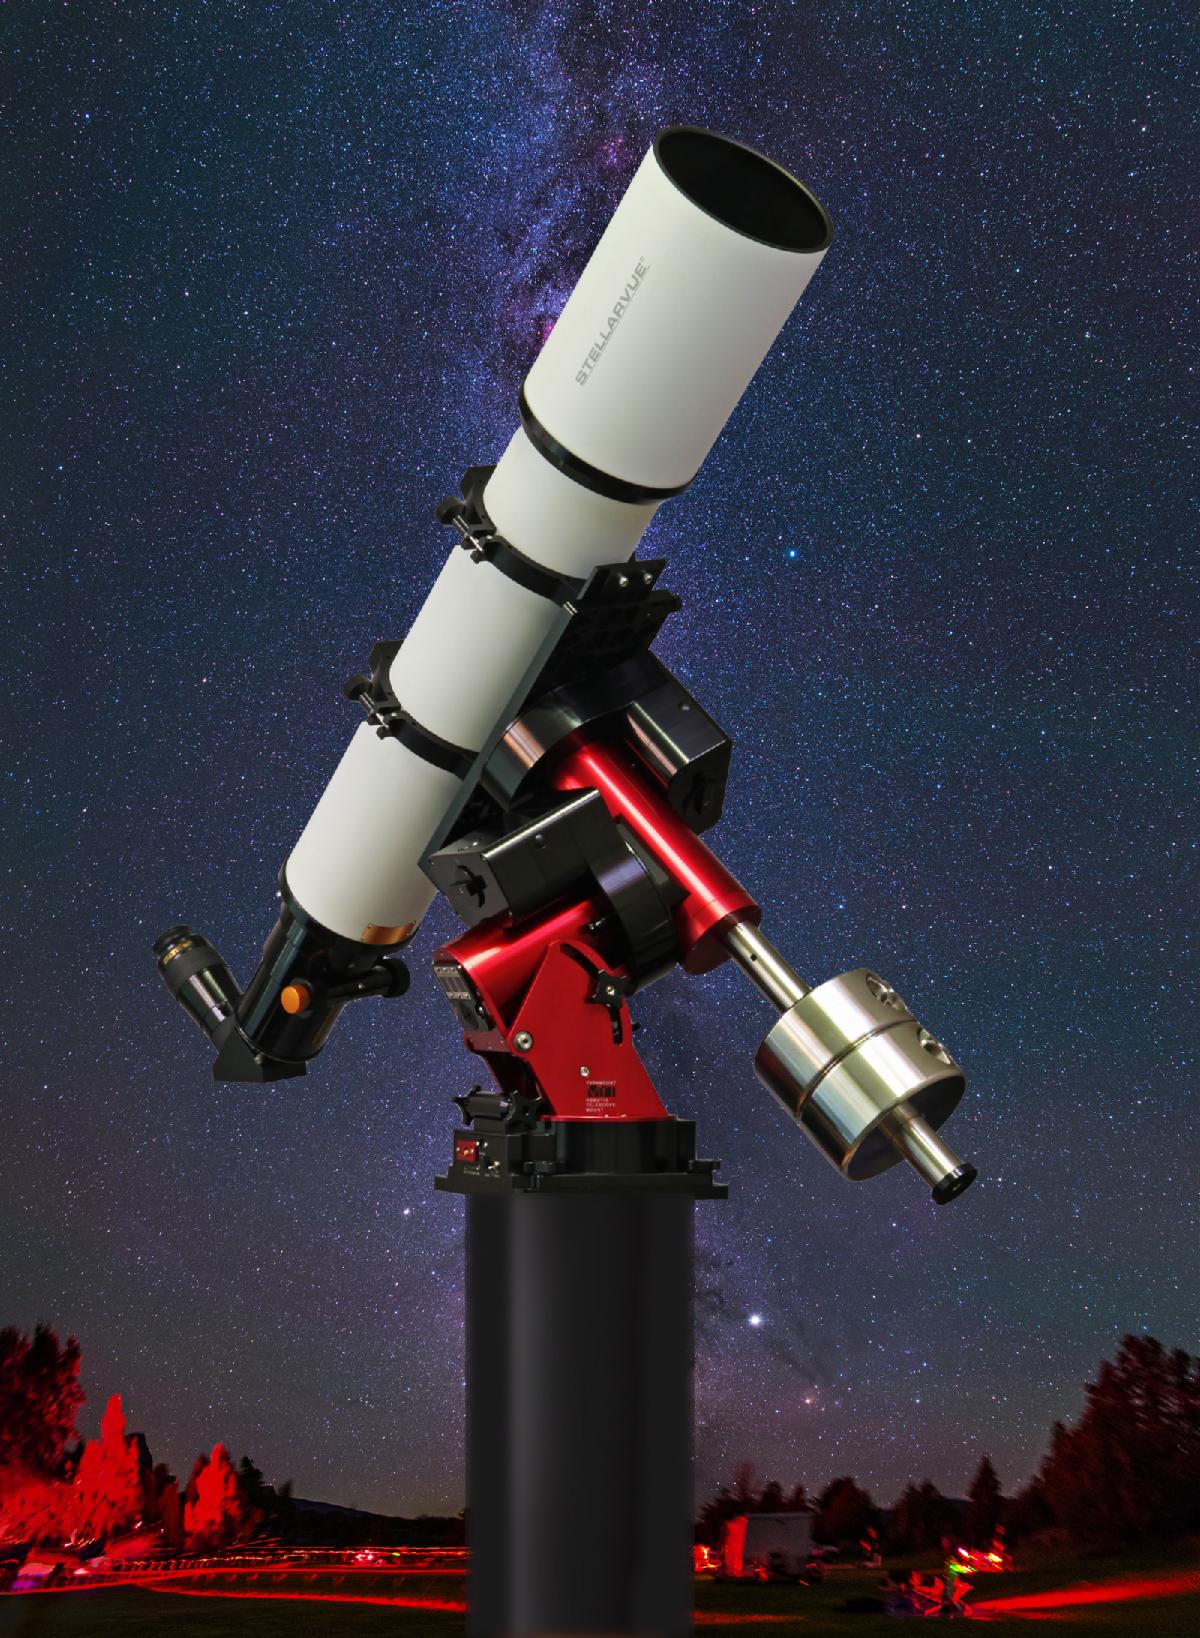
Stellarvue SVX140T with MYT Mount
While existing inventory remains, save up to $2000 on a package with either a Stellarvue SVX140T or an SVX140T-R with a 3.5" Feather Touch focuser or a Moonlite Nitecrawler focuser, our giant field flattener, a 19" Losmandy-style rail and the Paramount MYT mount head.
Contact us if you are interested in this big savings opportunity. (530) 823-7796.
| | | |
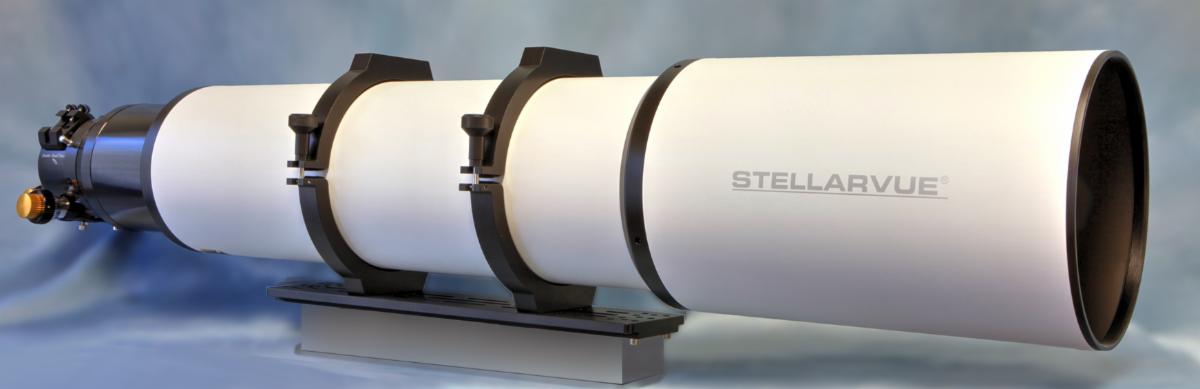
Stellarvue SVX180T made with genuine FPL55 Ohara glass. There are only four remaining for sale. Don't say we didn't warn you. | |
Learn What's "In the Sky" This Month! | |
Astronomy Teacher Bob MacArthur mapped out what will be in the sky for the month of January and how you can observe. Check out the video on our YouTube channel to get a walkthrough of all there is to see. http://tinyurl.com/2p87vuks | |
|
If you haven't yet registered for the Stellarvue Users Forum, you can do so here: Forums - Forums (vbulletin.net). There, we have created a new thread called "In the Sky" that invites our users to share their images and stories concerning the objects and phenomena that Bob teaches about in these monthly videos. Feel free to give it a go. We would love to hear about your experiences. | |
|
“It is very satisfying when it all comes together to produce a good image or video.”
-Barry Flansburg
| |
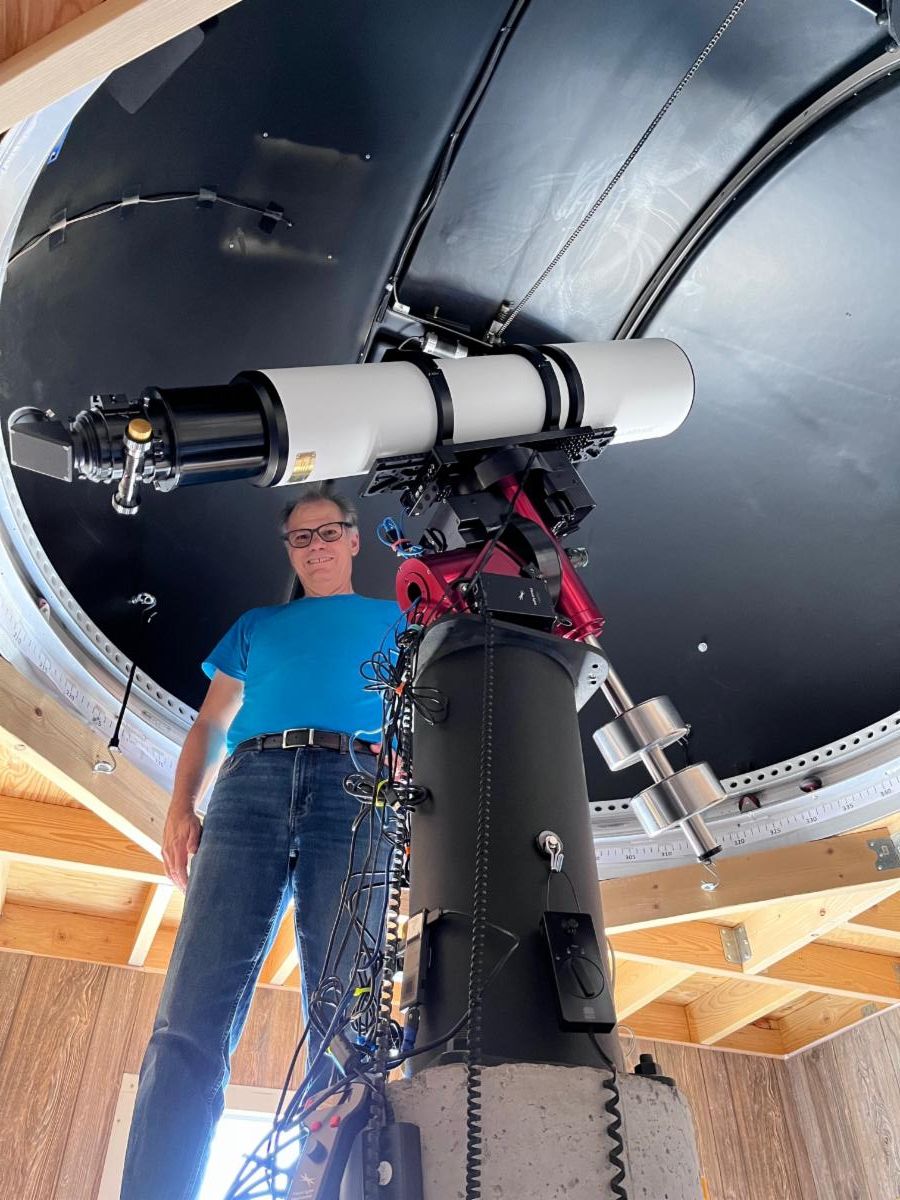
This month’s Stellar People article features retired aerospace engineer, amateur astronomer and astro-imager Barry Flansburg. Barry gave us a walkthrough of his early interest in astronomy, and his pursuit of the night sky since then. The responses he gave to our questions gave us a clear understanding of the drive required to learn about imaging, processing and the objects that he observes. Here is Barry’s story. We hope you enjoy it. | | | |
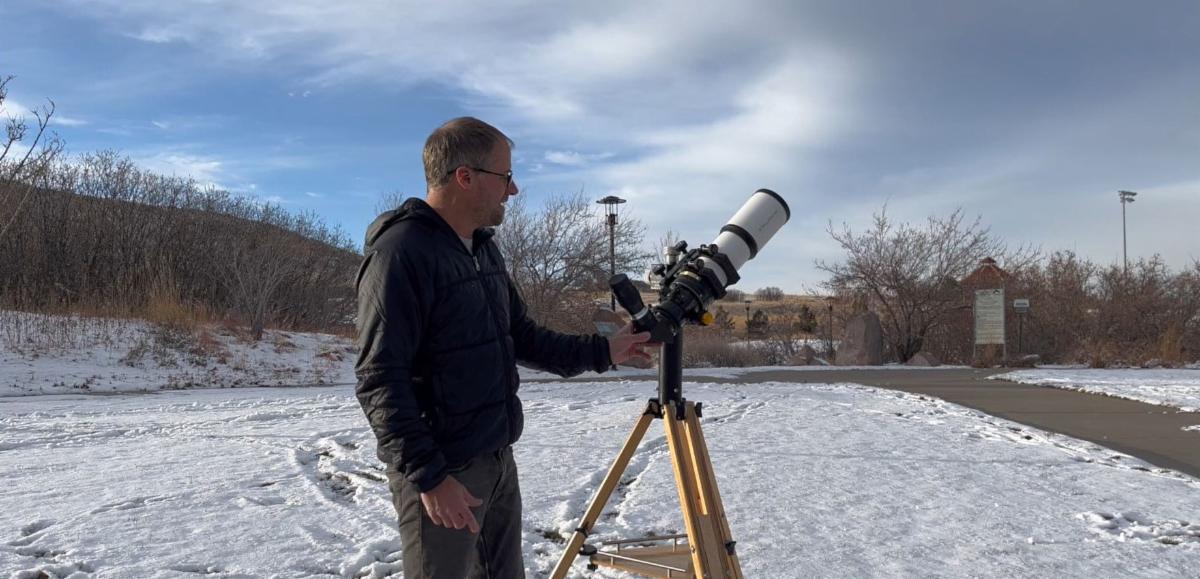
Barry with his SVX180T in his observatory. | |
|
Barry grew up in northern Virginia in the 1960s. He shared his memory of reading a picture book on the planets in 2nd grade, which he would choose over and over again from the bookshelf in the classroom. Also, Barry’s family subscribed to the Time-Life Science Library of books and two of his favorites were “Planets” and “The Universe.” His first telescope was a 3” Newtonian reflector with cardboard tube from Toys ‘R’ Us in 1969 which allowed him to see the craters on the moon. “This inspired me to save up my paper route money for a 3” equatorial refractor from Sears which arrived shortly before the solar eclipse of March 7, 1970. This telescope allowed me to see Mars, Jupiter and its moons, the rings of Saturn, and the brighter nebula, despite my suburban skies.” Barry followed this telescope up with an 8” Newtonian in high school, an orange-tube C8 in college, a 10” LX200, a C14 Edge, and most recently, a Stellarvue SVX180T refractor.
Next, Barry proceeded to take us on a deep dive into the evolution and progress in amateur astro-imaging:
“I had my first roll-film camera in the late 1960s for snapshots, so it was natural to try shooting pictures through my first telescopes. Of course, it took a week before you could get pictures developed and see your results. My first 35 mm SLR camera, a Pentax Spotmatic 500, was a big step forward because it has a removable lens, and you could focus through the viewfinder. I learned to develop film myself to give me more control over the results, first black-and-white and then Ektachrome color slide film. Many pictures were ruined by trailed stars and shutter vibrations, but I was happy if I got even one keeper on a 24-exposure roll of film.”
“The CCD revolution arrived for amateur imagers in the 1990s. By today’s standards, the first CCD cameras were low resolution and relatively insensitive to light. But you could see your results immediately, allowing you to fix problems before you lost a whole night’s work. A 5 second exposure would easily show the central star in the Ring Nebula while a 5-minute exposure would reveal the Horsehead Nebula or the Whirlpool Galaxy. A CCD camera could autoguide your images to produce sharp, round stars. The following decades have seen continuous advancements in camera sensitivity, resolution and download speeds. CCD yielded to CMOS, available in both monochrome and one-shot-color cameras. Filter wheels enabled both RGB and narrowband imaging.”
| | | |
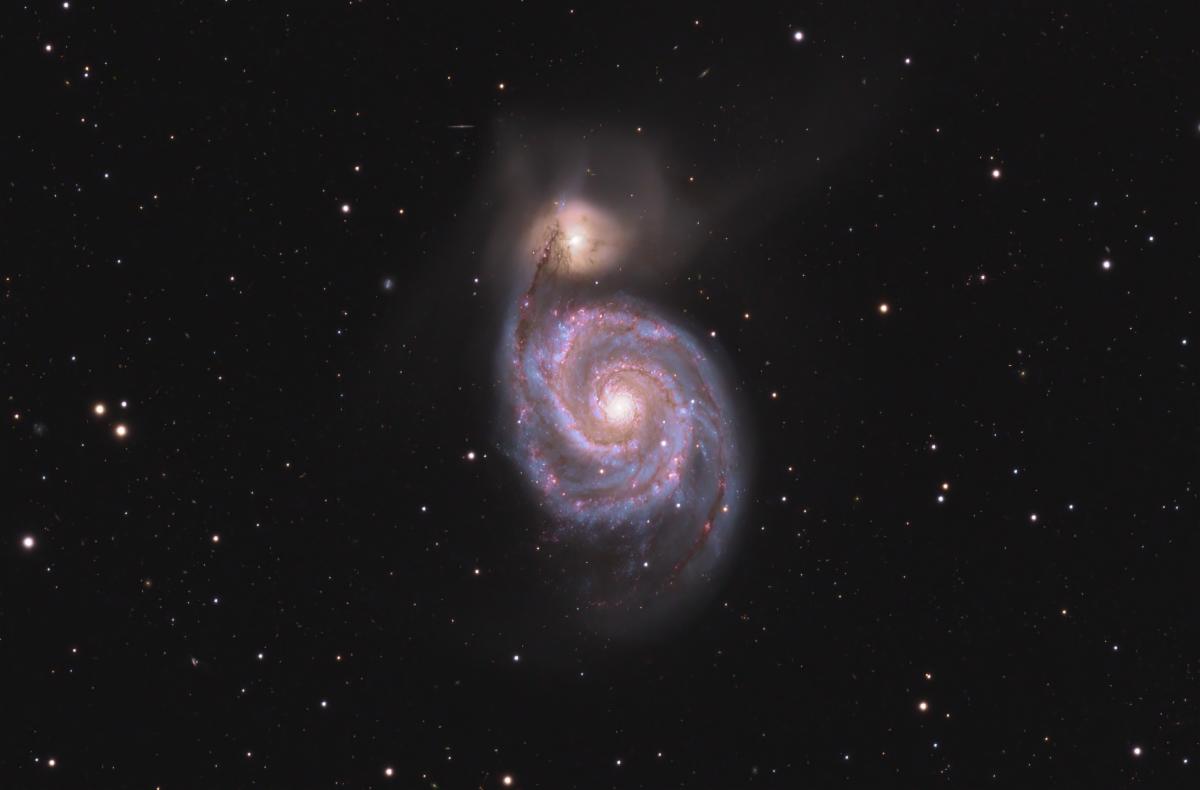
An image of M51, the Whirlpool Galaxy, captured by Barry. | |
|
“In parallel with the hardware, there has been a revolution in imaging software. Stacking software allows dozens or hundreds of short exposure sub-images to be combined, discarding the worst ones and smoothing out background noise to create images with many hours of total exposure. Stretching software brings out the details buried in faint images that would otherwise be invisible. Noise reduction and sharpening software add the final touches to turn “bland” images into spectacular ones. Finally, sequencing software makes it possible to run an entire night’s imaging automatically, controlling the dome, mount, filter wheel, focuser, camera, and autoguider from dusk to dawn, unattended or even remotely. The progress in amateur astro-imaging has been amazing.”
When asked what it was about taking images of the night sky that initially sparked his interest, Barry responded with the following. “Imaging makes it possible to share the hobby with others, both fellow amateur astronomers and the general public. I post my pictures on AstroBin for other imagers to see, but my wife posts them to social media sites for the local community who are very enthusiastic. They like that the pictures were not taken with some telescope in space or on a mountaintop in Chile, but rather a location just down the road under the same skies that they see at night. And they were taken not by professionals but by a local amateur just for fun.”
We then asked Barry what, in particular, was the aspect of astro imaging that attracted him the most early on. He answered by saying that he was attracted to astro-imaging because it combined two hobbies that he enjoyed - astronomy and photography. He went on to say that “also there is the technical aspect of it that requires planning and the coordinated use of some pretty sophisticated equipment that all has to work together at the right time, pointed at the right location in the sky. It is very satisfying when it all comes together to produce a good image or video.”
We then asked Barry if there was anyone in particular who got him interested in astro-imaging? He said, “there wasn’t anyone in particular who got me interested in astro-imaging, but I have been fortunate to have friends and coworkers throughout my life who shared an interest in imaging. This has allowed us to share experience and techniques that have allowed us to improve our images. Also, online forums such as CloudyNights, allow sharing knowledge and practices with people all over the world.”
In response to the sorts of feelings he experiences when taking or processing images of the night sky, Barry stated that “When taking images, I am concentrated on making sure I have setup everything for the night’s imaging session, such as the object framing, camera gain and exposure, focus, mount meridian flip, number of subs for each filter, etc. Once the sequencing software has started, there is some anxiety over things beyond my control which could jeopardize the night’s work such as clouds moving in or hardware/software glitches. Finally, when the sequence is completed, I am excited to transfer the sub-images to my desktop computer and start the stacking software so that I can finish processing the images when I wake up in the morning. Often, I will be sharing my finished images online by 10:00 AM. I’m not the sort of imager who spends weeks tweaking the processing of my images.”
Barry considers himself to be a “Jack of All Trades, Master of None,” imager. “I love imaging deep sky objects, both galaxies and nebula, but I have yet to exceed 10 hours of total exposure on any one object. When they are favorably placed, I image the planets including Venus, Mars, Jupiter and Saturn. Jupiter in particular is interesting because of its fast rotation rate, bright moons, and cloud features, which make it a great target for recording time lapse videos. I image the Sun through a hydrogen alpha solar scope to record images and time lapse videos of surface features and prominences. When bright comets are visible, I enjoy recording time lapse videos of them passing through starfields with active features flowing within their tails. Having this variety of imaging interests makes it so that I am able to image throughout the year, day or night, regardless of the phase moon.
| | | |
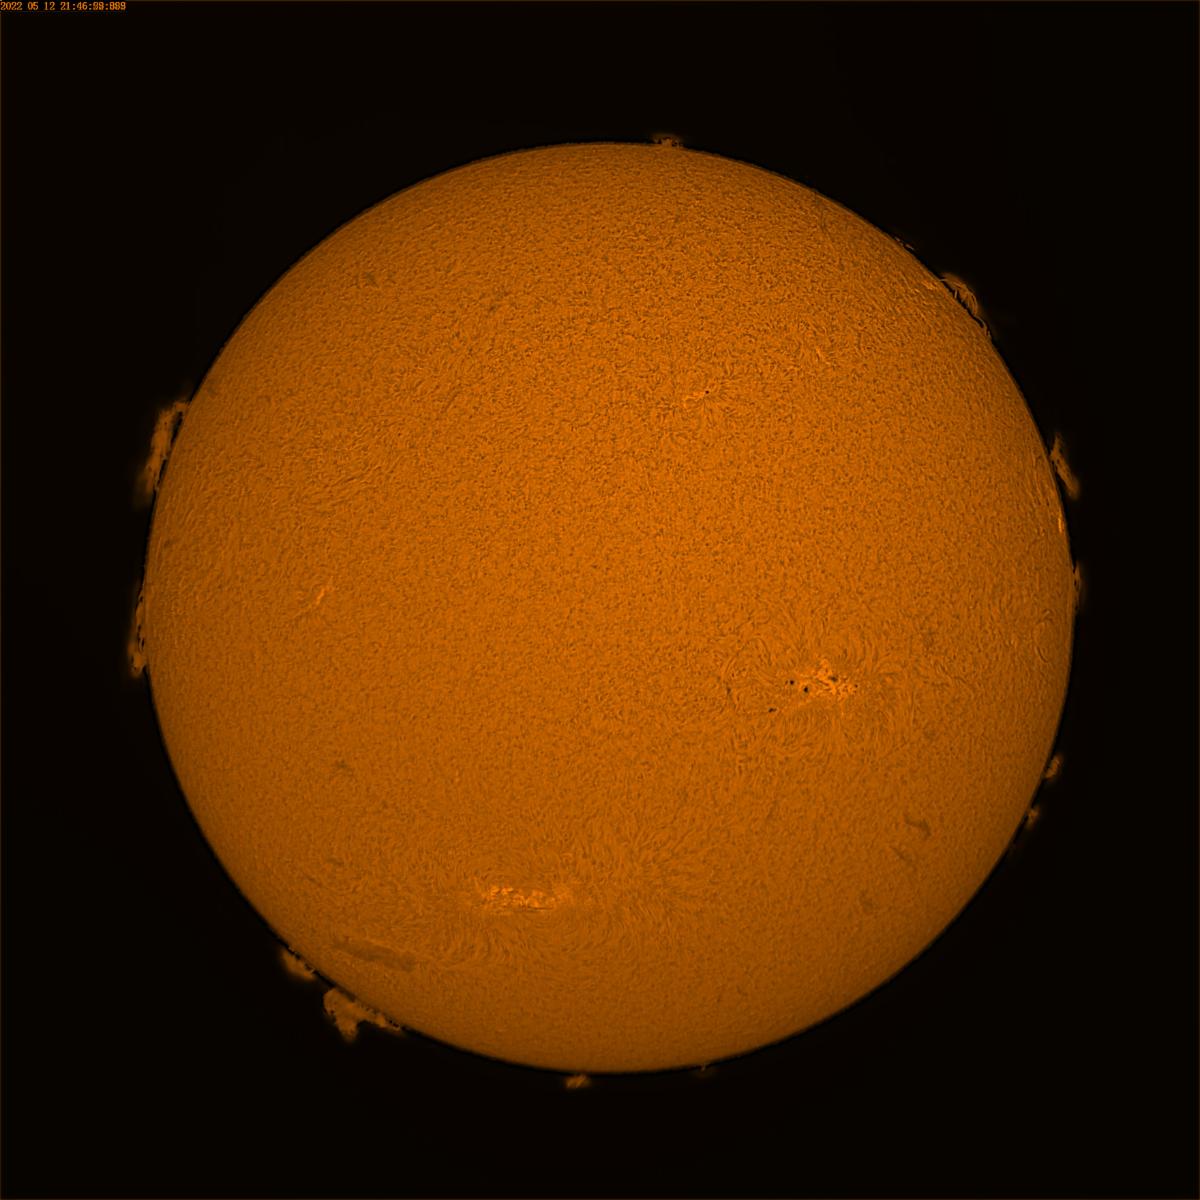
An image Barry captured of the Sun. | |
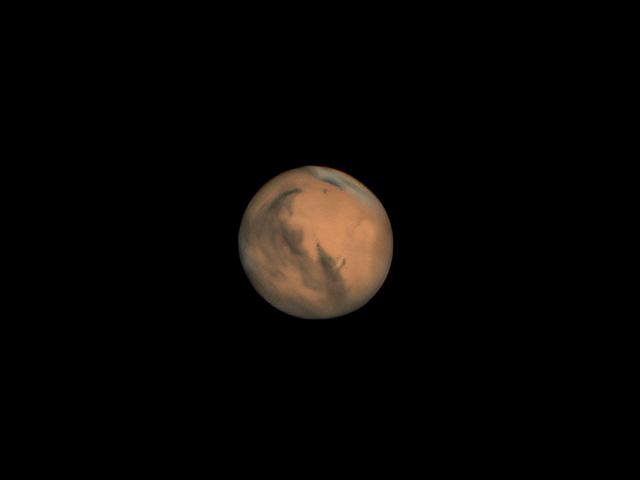
An image of Mars, taken by Barry. | |
|
Barry shared with us that the image he is most proud of is a time lapse he recently captured of “the planet Jupiter during a shadow transit by the moon Io with the Great Red Spot also visible. I had to carefully plan the imaging session so that I could capture Io entering the frame, followed by its shadow, then traversing the entire face of the planet and exciting the frame on the opposite side. This took place over nearly four hours, during which I had to keep the planet centered in a small 656 x 600-pixel box and refocus periodically as the temperature dropped throughout the night. The telescope was my Stellarvue SVX180T refractor with a 3X Barlow lens to increase the image scale. I recorded 195 separate 60-second videos, each containing nearly 5000 frames of short 12 millisecond exposures to freeze the seeing. A total of 355 gigabytes of data was recorded. The videos were stacked in AutoStakkert, selecting the best 80% of the frames in each video. WaveSharp was then used to apply wavelets sharpening and adjust the color saturation and balance. Topaz Denoise was then used for noise reduction and further sharpening. Finally, WaveSharp was used to produce the time lapse video in animated GIF format. The resulting video shows the planet rotating nearly 180 degrees with much detail visible in the clouds and within the Great Red Spot as Io and its shadow cross the face of the planet. It required a lot of planning and good luck with seeing and staying steady over the four-hour capture period. Here are links to the video on AstroBin and Stellarvue: https://www.astrobin.com/4qgsqb/
https://www.stellarvue.com/stellarblog/svx180tjupiter/
Next, we asked Barry who some of his favorite astro-imagers were. He responded by saying that John Hayes is his favorite deep sky imager. “He has a PhD in optics and recently put his CDK20 telescope in a remote observatory in Chile. John has published many articles on optimizing resolution in deep sky images. About 10 years ago, he advised me ahead of the purchase of my C14 Edge telescope. His images are amazing!
"Damian Peach, Christopher Go, and Dan Llewellyn are my favorite planetary imagers. Damian Peach and Christopher Go produce amazing planetary images from low-latitude island locations in the Caribbean and the Philippines, respectively. They are both also very active in sharing their techniques with other imagers. I met Dan Llewellyn when he lectured at a Peach State Star Gaze star party when I was a member of the Atlanta Astronomy Club. He was an early advocate of one-shot-color cameras for planetary imaging."
When asked what telescope it was that got Barry interested in what he does now, he shared that his C14 Edge HD telescope opened up a lot of possibilities for astro-imaging. “It has a long native focal length of 3910 mm at F11, which is good for planets and the many small deep sky objects. But it can also be reduced to 2737 mm (F7.7) with a focal reducer or even 690 mm (F1.95) with a HyperStar adapter to allow wide-field imaging. With a camera and off-axis guider, this scope enabled me to take a lot of images of deep-sky objects."
We then asked Barry when it was that he first discovered Stellarvue telescopes and how that has made a difference for him. He answered saying, “I first learned about Stellarvue years ago from their ads in Sky & Telescope and Astronomy magazines. Early in 2023 I did some calculations that showed that for my seeing conditions and camera pixel size, I needed a minimum aperture of 6.84 inches and a minimum focal length of 1163 mm to capture all the resolution that my seeing would allow. (see https://www.cloudynights.com/topic/874304-selecting-a-telescope-for-a-camera-and-seeing/?p=12665378). These requirements fit almost perfectly with the SVX180T telescope (7-inch aperture and 1260 mm focal length). The SVX180T has meant that I can capture more than 9 times the area of sky as my C14 while maintaining the same resolution. So, I can image much larger objects or crop around smaller objects as desired. Also, I was pleased to find that the SVX180T is a very competent planetary imaging telescope when combined with a 2X or 3X Barlow lens. It has the advantage that it stays perfectly collimated, unlike reflector telescopes which require frequent re-collimation when doing planetary imaging. So, the SVX180T has been very versatile for me as an imaging telescope."
When asked to reflect on how long it has taken Barry to build-up his knowledge and experience with astro-imaging, Barry said, “It definitely seems like a long time - after all, I’ve been imaging for 50 years! But knowledge is one area of astro-imaging that does carry over to other areas, so that helps. For example, a lot of my planetary imaging techniques carry over to solar imaging. So, it does seem to get easier as time goes by."
We asked Barry if there were ever any moments where he struggled to grasp, learn or acquire the knowledge, skills or resources necessary to continue pursuing his passion of astro-imaging, and how that worked out for him. He said that probably the greatest difficulty he had was in getting the benefit from stacking large numbers of short exposures for deep sky imaging. “I certainly understood the theory, but getting results from the stacking software I was using (MaximDL) and ImagesPlus) was difficult. The breakthrough for me was switching to AstroPixelProcessor (APP) at the suggestion of a friend. APP not only stacked the images, but it also stretched them automatically so that I could immediately see a nice initial result. With a few additional steps in Photoshop, I had the results I was aiming for. But it was a frustrating several months there.”
Barry went on to share with us some of the ways astro-imaging has contributed to who and where he is today. “As a retired aerospace engineer, astro-imaging gives me a technically challenging hobby to help keep my mind sharp. In 2020, my wife and I moved from metro Atlanta to the New Mexico Astronomy Village near rural Deming, New Mexico. We get a lot more clear nights here and the skies are much darker. The Village also provides an opportunity to share the hobby with like-minded neighbors. So, I’m living the dream!"
Some things that Barry wished he had learned earlier on his astro-imaging journey go as follows. “I wish that I had started using an off-axis guider years before I did instead of wasting my time with piggyback guidescopes which don’t work well with Schmidt-Cassegrain telescopes. I wish I had switched to using AstroPixelProcessor sooner for image stacking and processing."
| | | |
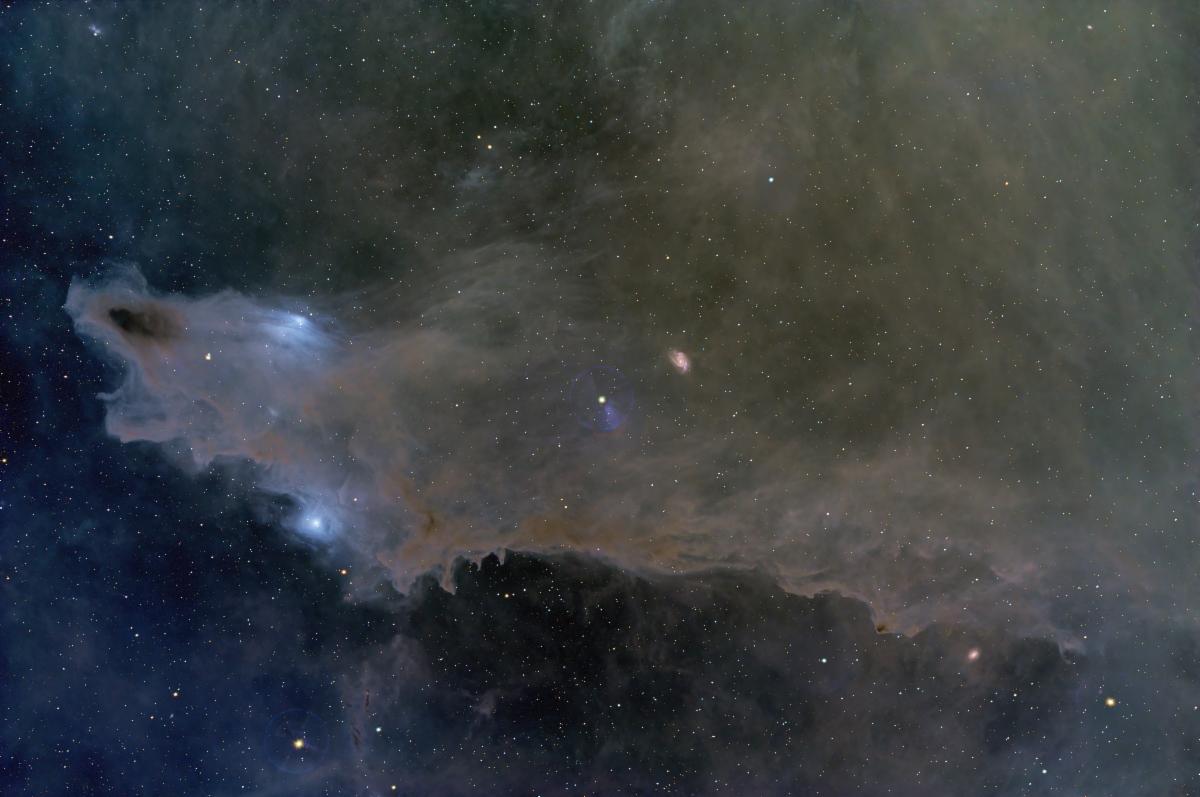
An image caught by Barry of the LDN1235, the Dark Shark Nebula. | |
|
As our interview with Barry came to a close, we asked him what advice he would give to up and comers pursuing astro-imaging as a hobby or career. "I would advise people to keep the hobby fun and avoid frustrations that can lead them to quit what should be a lifelong hobby. So, for deep-sky imaging, start off with a simple setup such as a wide-field refractor on an equatorial mount with a one-shot-color camera. Learn to stack and process short, unguided exposures. Then follow your interests and add the necessary complexities such as guiding or a monochrome camera with filters. For planetary imaging, you will need a longer focal length and a dedicated color planetary camera capable of high frame rates. Learn to take and process your planetary images with FireCapture, SharpCap, AutoStakkert, and WaveSharp, which are free or nominal cost. Finally, use the CloudyNights online forums as a resource for knowledge and advice on all types of astro-imaging."
This interview with Barry provided an incredible amount of useful information for our Stellarvue community and particularly for astro-imagers. The persistence that Barry has shown in his imaging is an inspiration for Stellarvue, and we hope it is for you as well. We would like to give a special thanks to Barry for sharing his knowledge and experience with us, as well as his support for the work done at Stellarvue.
| | | |
|
Tell us your story! Email mail@stellarvue.com. Include an image of you
and your set-up and what led you to choosing a Stellarvue. We want to hear your entire story as we help others make their first choice the right one.
| | |
|
Message From
Vic and Jan Maris
Barry Flansburg is in a very limited club of SVX180T owners who are talented and do exceptional work.
We would like to thank all of our customers who made 2023 our most successful year ever. Your support enables us to create our fine instruments with objectives hand figured here in California.
Happy New Year to everyone in our growing Stellarvue family.
| | |
The mission of Stellarvue is to inspire a healthy interest in science and astronomy by handcrafting precision telescopes. | |
|
Stellarvue Telescope | 11802 Kemper Rd. | Auburn, CA 95603
www.stellarvue.com | 530.823.7796
Open 9 - 5 Pacific Time; Mon - Fri
| | | | |